You can create your own hue gradient lightstrip using some components like a board, lightstrip, and a power adapter. The lightstrip supports 7 zones, just like the official Philips Hue Play Gradient Lightstrip. This is to simulate the Philips Hue original. Creating the lightstrip requires soldering and some really advanced steps to flash the board. It is meant for the advanced user who is into a challenge.

What do I need?
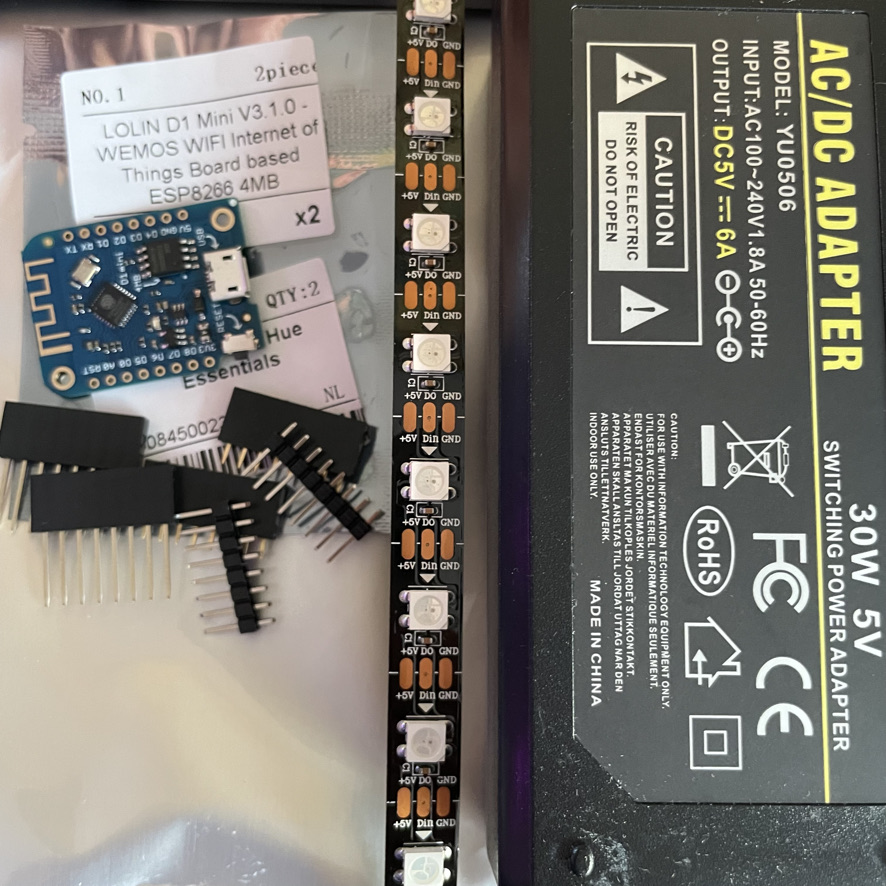
- ESP8266 board - Amazon.de, Amazon.de (alternative), Amazon.com, AliExpress
- WS2812B lightstrip - AliExpress, Amazon.de, Amazon.com
- 5V 6A power adapter - AliExpress, Amazon.de, Amazon.com
- Raspberry Pi (for diyHue) - Amazon.de, Amazon.com, AliExpress
Furthermore, you will need Hue Essentials as the app to run Sync on your Android TV or other devices.
Build the lightstrip
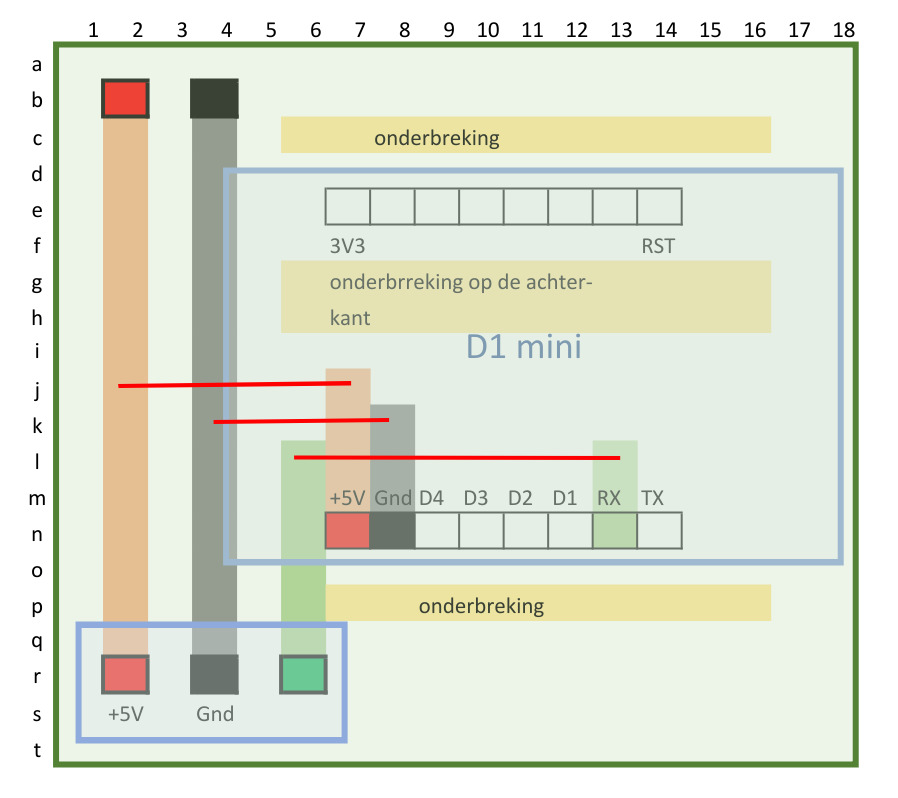
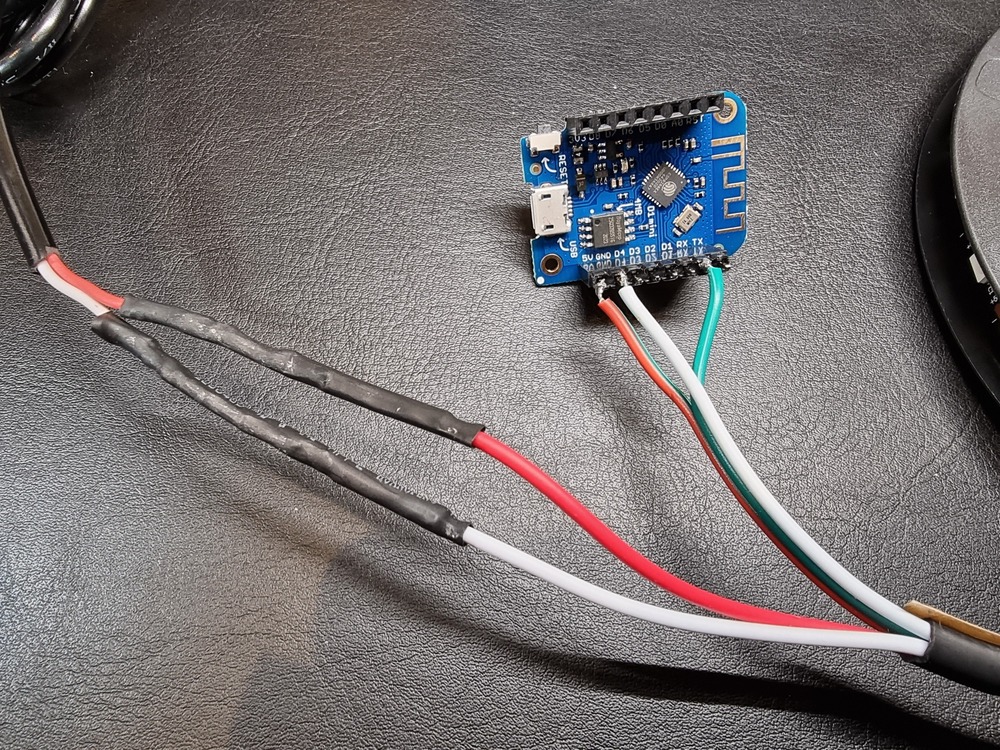
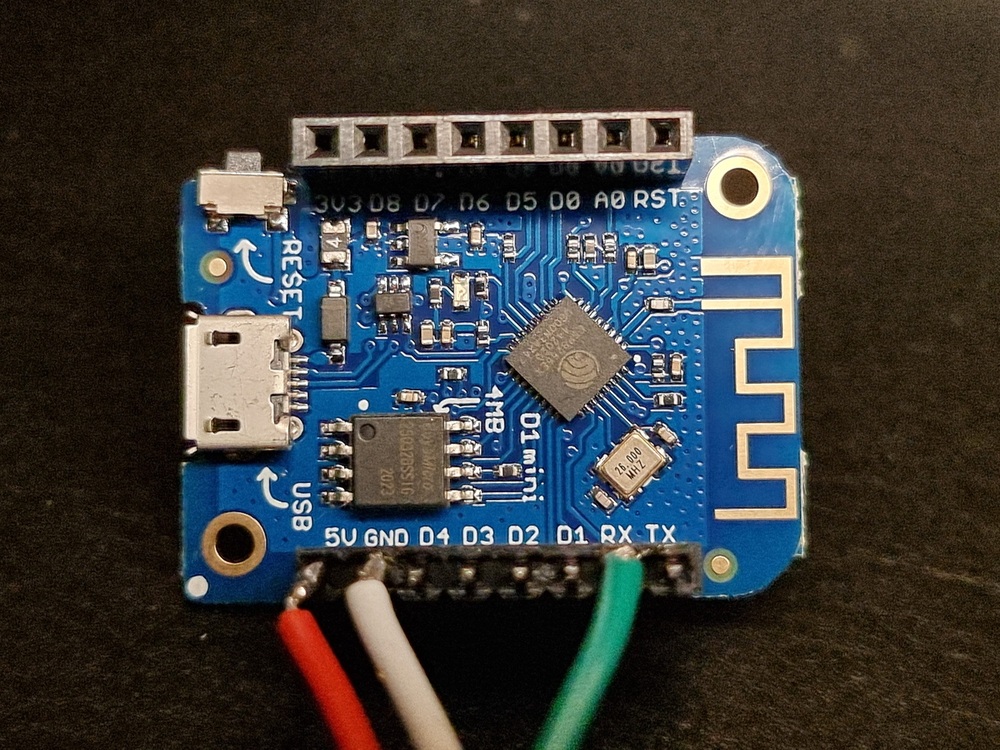
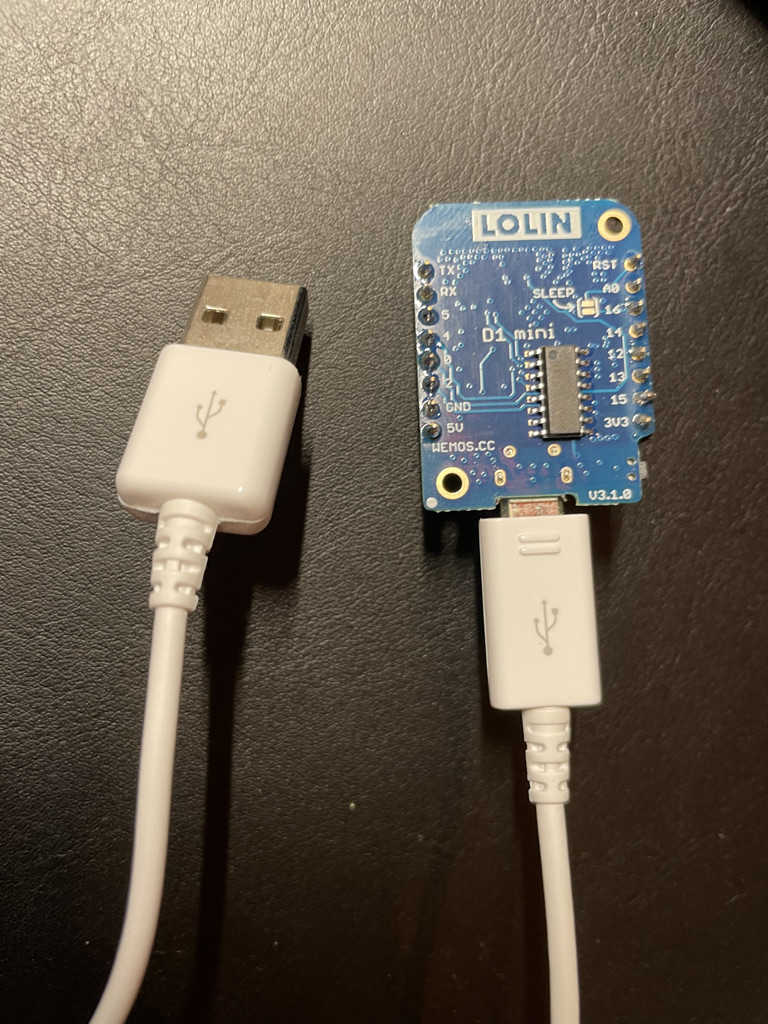
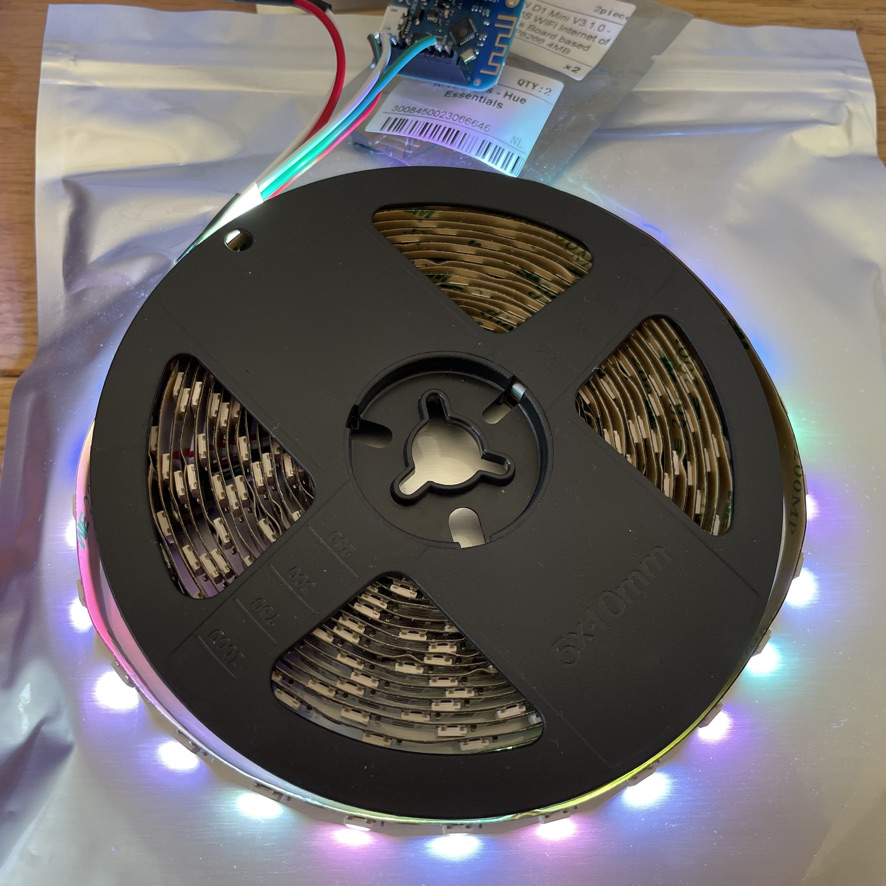
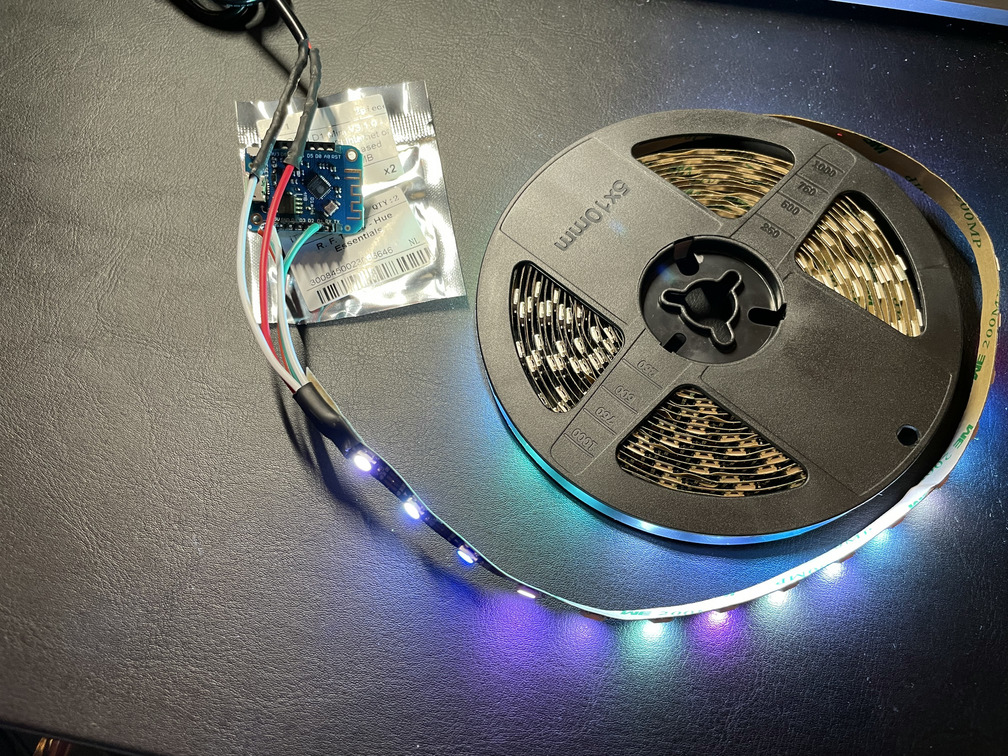
- Connect the red/white/green wires of the lightstrip to the board. Connect red to 5V or VIN, white to GND or G, green to RX. You will need to solder the wires to the board. You may use the included pins so you can easily connect and disconnect the board.
- Connect the other two red/white wires of the lightstrip to the 5V power adapter. Connect red (+) to red, white (-) to white.
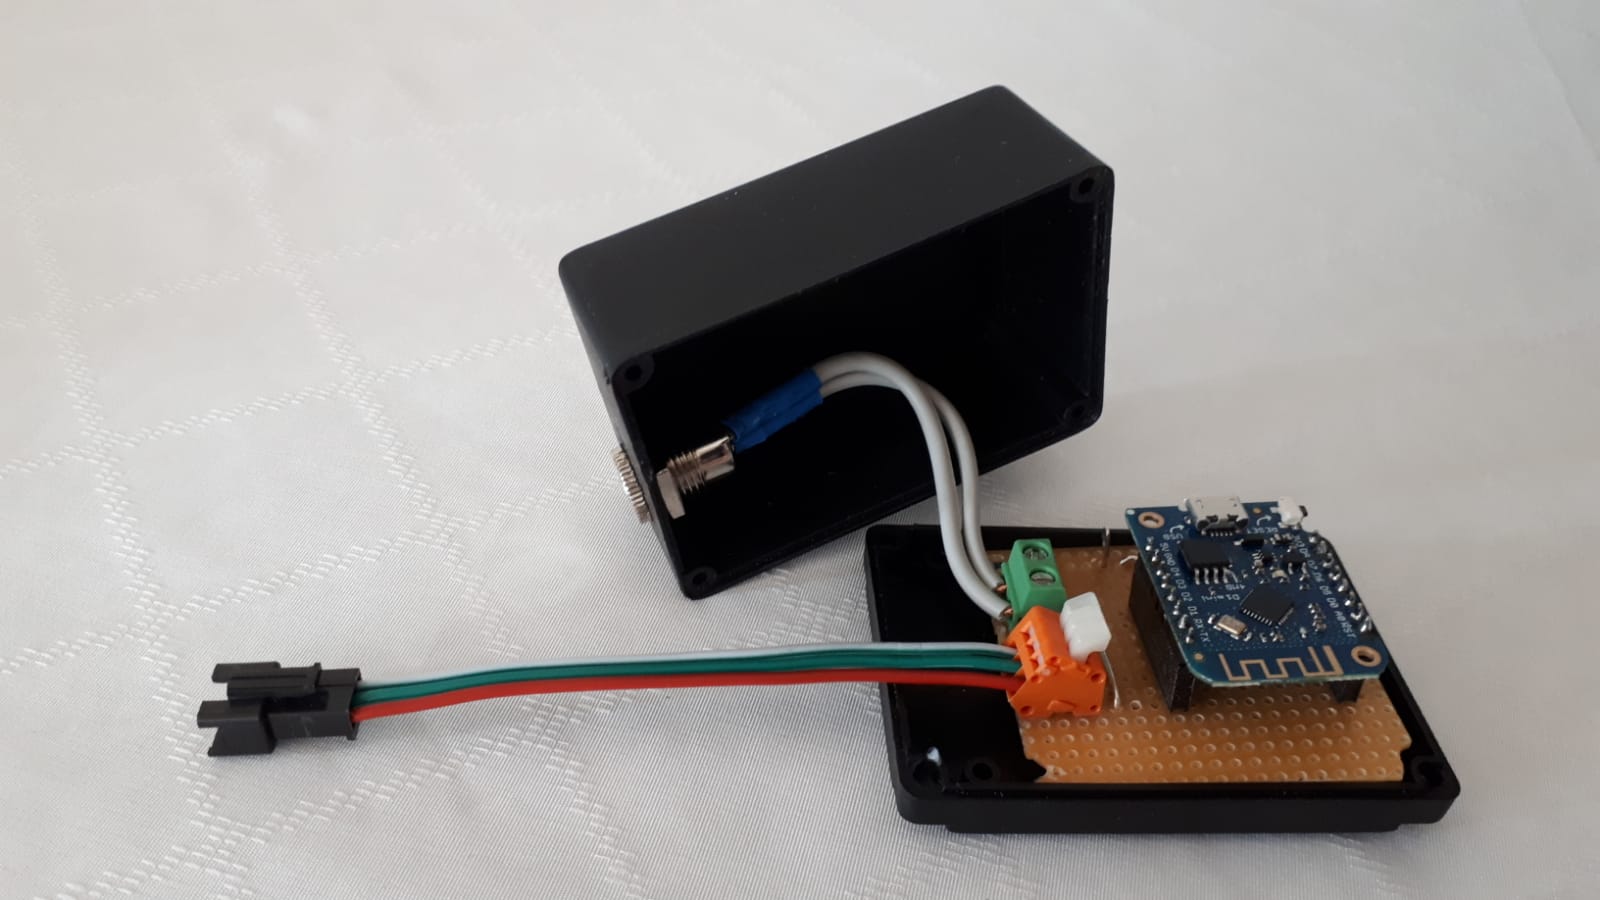
This is what the result looks like:
Flash the board
-
Install and open Arduino IDE on your PC or Mac
-
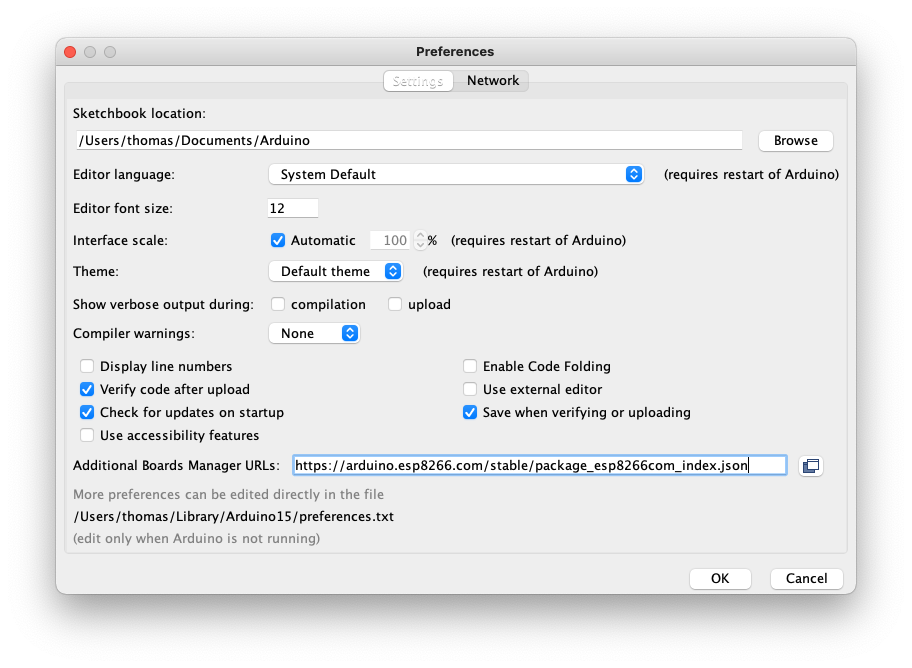
Go to Preferences, add the following URL to Additional Boards Manager URLs, and tap OK:
https://arduino.esp8266.com/stable/package_esp8266com_index.json -
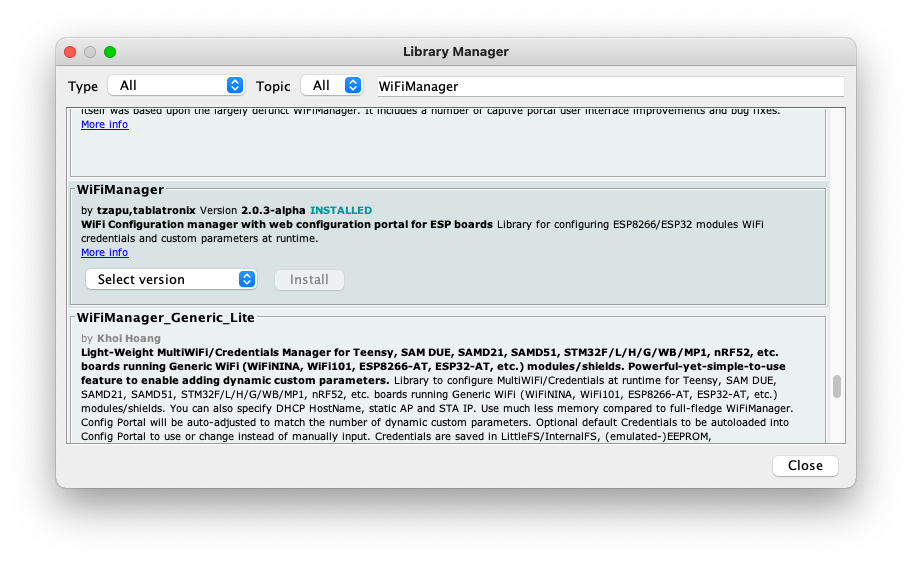
Now go to Tools, and tap Manage libraries
-
Install WiFiManager by tzapu,tablatronix (GitHub)
-
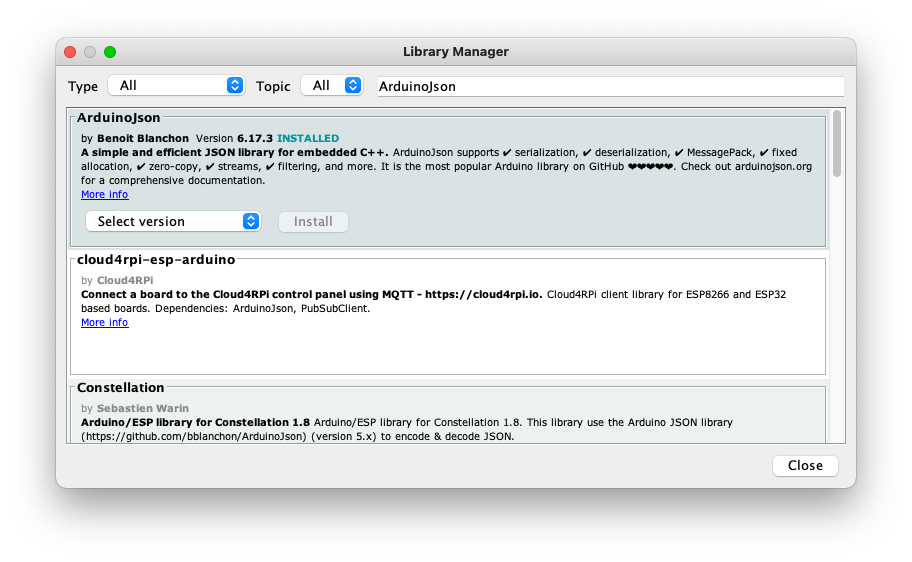
Install ArduinoJson by Benolt Blanchon (GitHub)
-
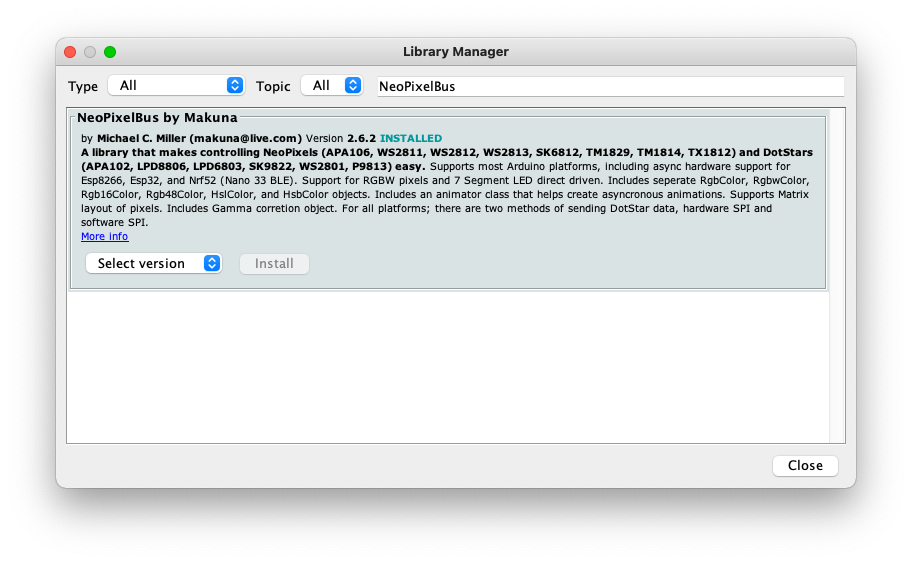
Install NeoPixelBus by Makuna (GitHub)
-
Go to Tools, tap Board: …, and tap Boards Manager
-
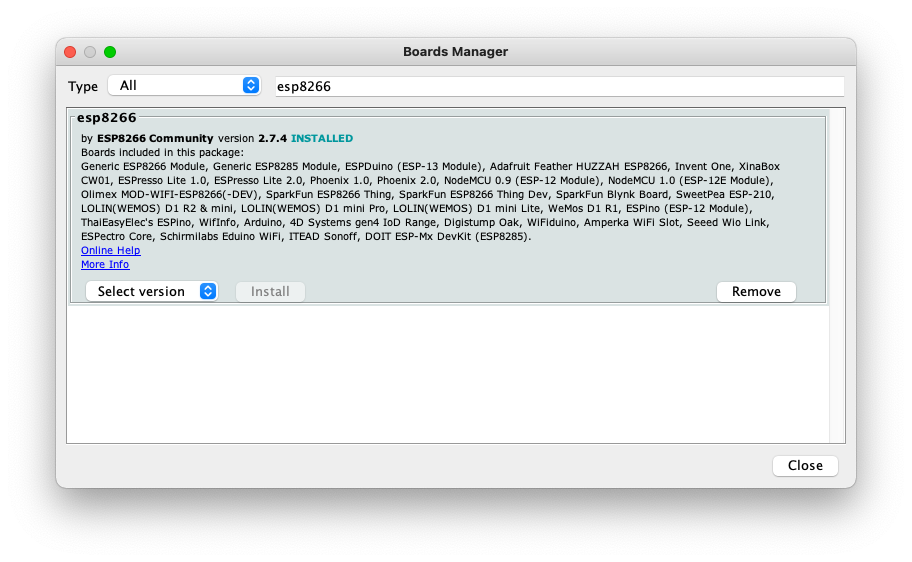
Install esp8266 by ESP8266 Community (GitHub)
-
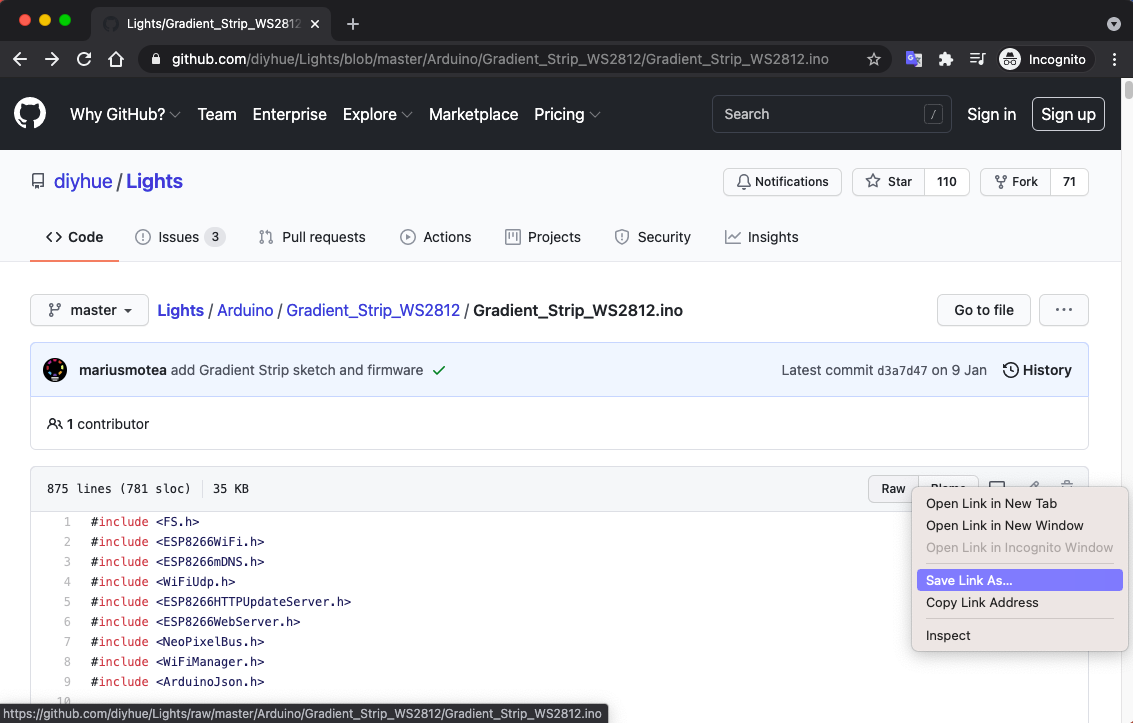
Download the Gradient_TV_Strip_WS2812.ino sketch from diyHue (open the link, on that page right click Raw, and click Save Link As).
-
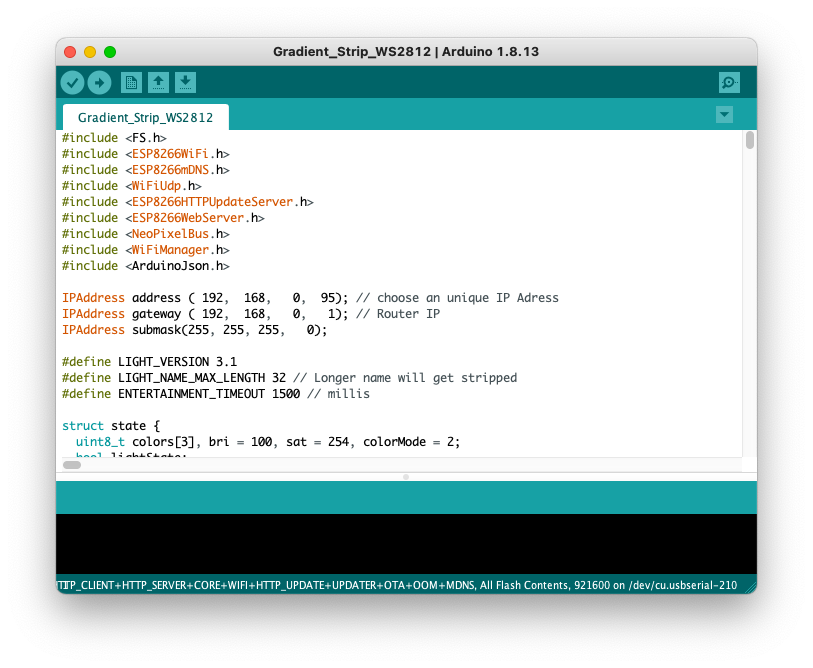
In the Arduino IDE, tap File, tap Open, and select the downloaded .ino file.
-
Remove your board from power and the lightstrip. Then connect it to your PC or Mac using the USB port
-
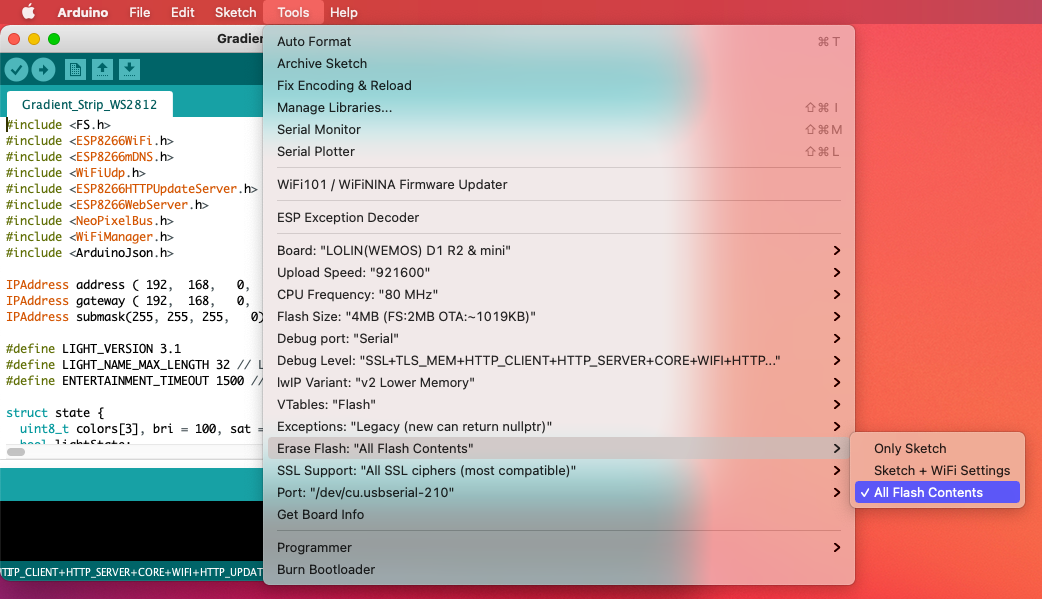
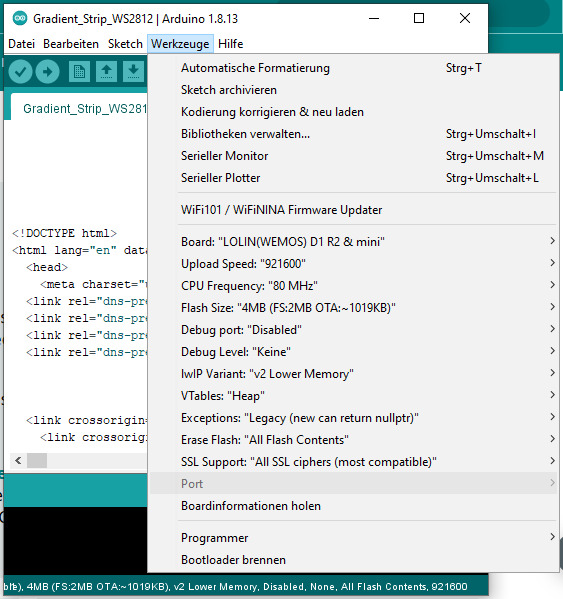
In the Arduino IDE, go to Tools and change the following settings:
-
Tap Board: …, tap ESP8266 Boards (…), and select your board. In our case it is the LOLIN(WEMOS) D1 R2 & mini
-
Set Erase Flash to All Flash Contents
-
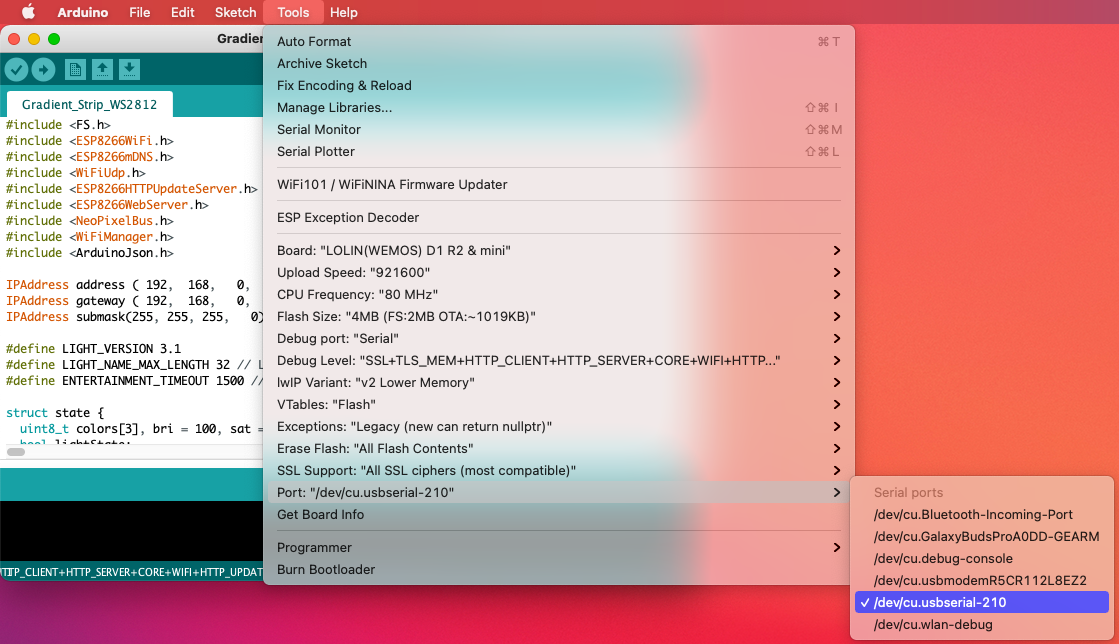
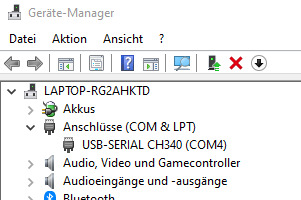
Set Port to the port you connected your board (if you connected your board through usb, then select the port with usb in the name. If you are using Windows, open Device Manager, go to Ports, and check which COM port it is connected to)
If the port is greyed out in Arduino, the board is either not connected through the USB cable or its driver for the port is missing.
Arduino IDE should install the drivers automatically, but in case that does not work, try the following:Workaround
In order to install the driver, you need to point the location to a downloaded driver. Google for Hardware-ID mentioned in the details in Device Manager. Alternatively, use this driver, or Microsoft driver) or use the CH340 driver included with Arduino under
C:\Program Files (x86)\Arduino\drivers.
-
-
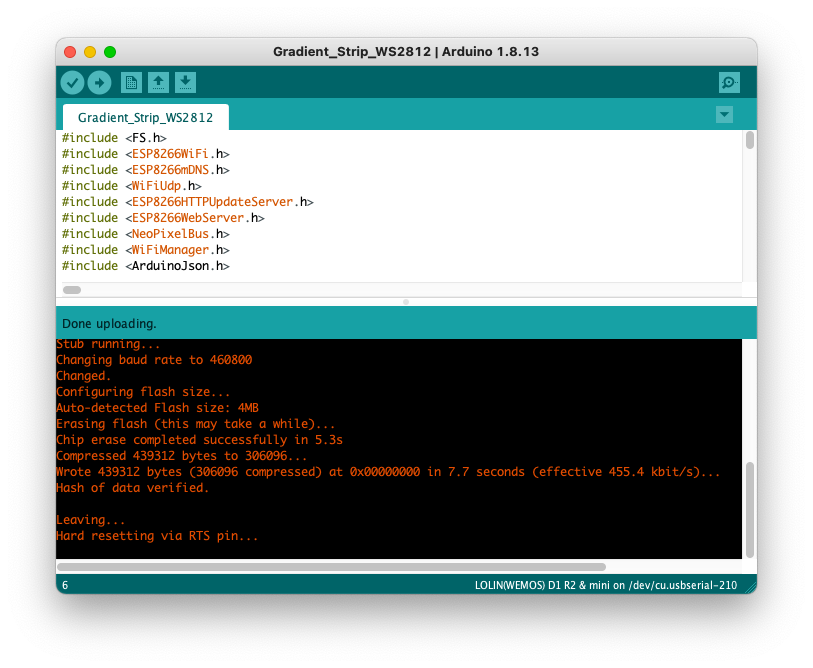
Go to Sketch, and tap Upload
-
Wait until the flashing was successful

If you are using a Mac and get the following error:
pyserial or esptool directories not found next to this upload.py toolThen follow this workaround:
Workaround
- Open the file
~/Library/Arduino15/packages/esp8266/hardware/esp8266/2.7.4/tools/esptool/esptool.py- Replace line 29 and 30 with the following:
iokit = ctypes.cdll.LoadLibrary('/System/Library/Frameworks/IOKit.framework/IOKit')
cf = ctypes.cdll.LoadLibrary('/System/Library/Frameworks/CoreFoundation.framework/CoreFoundation')
- Save the file, restart Arduino IDE, and try again.
See also comment #3 at PySerial and EspTools Directory Error - #4 by flszen - IDE 1.x - Arduino Forum
Configure the lightstrip
-
Remove the controller from your PC or Mac and connect your lightstrip and power adapter to the controller. Only a small section of the lightstrip now emits colours.
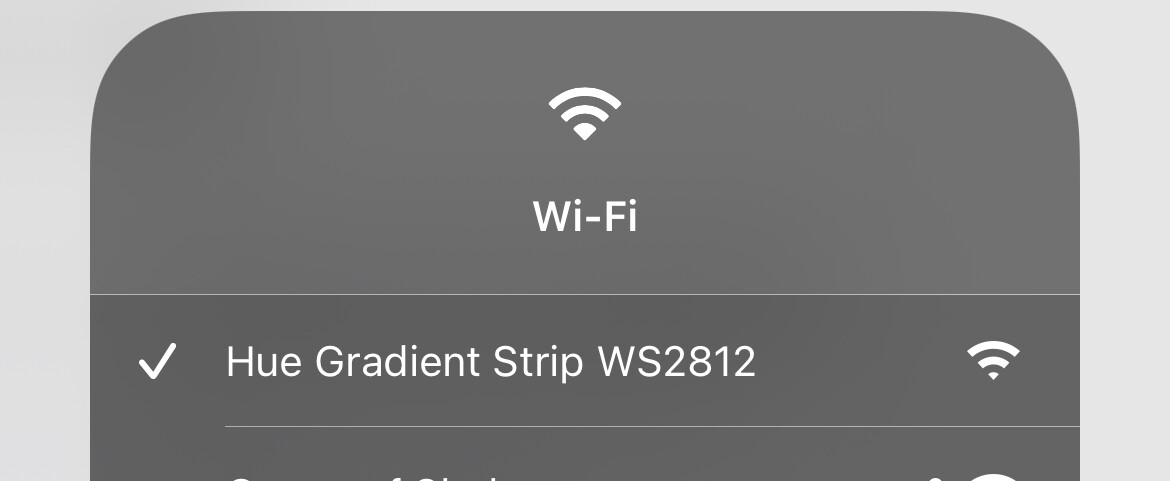
-
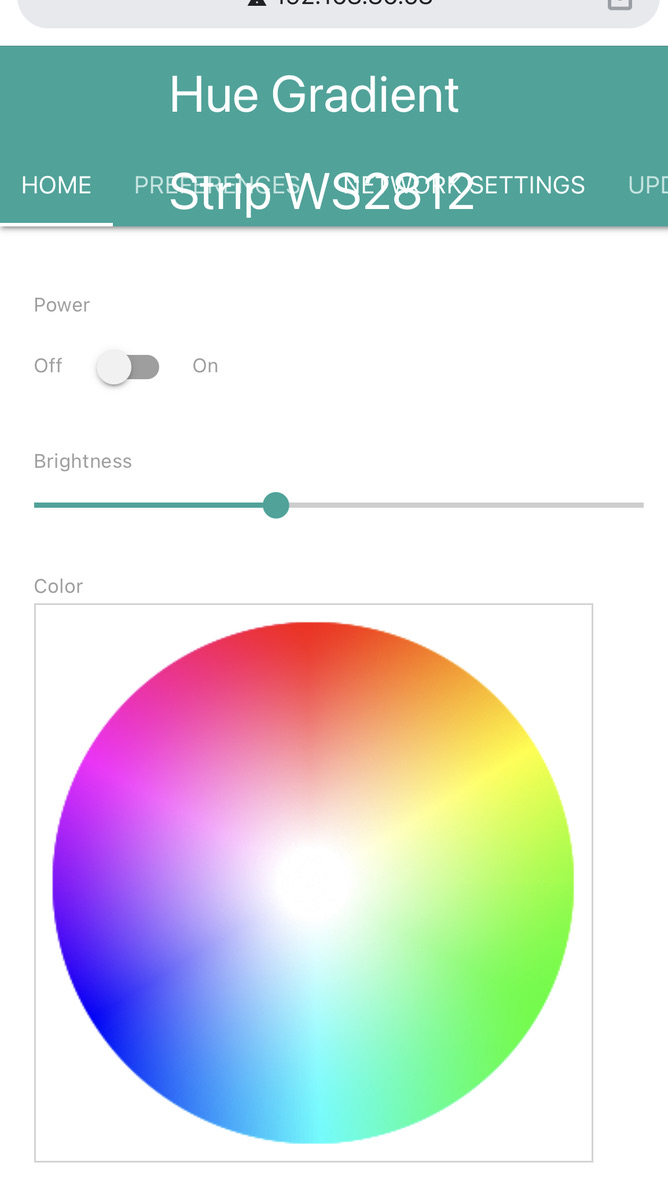
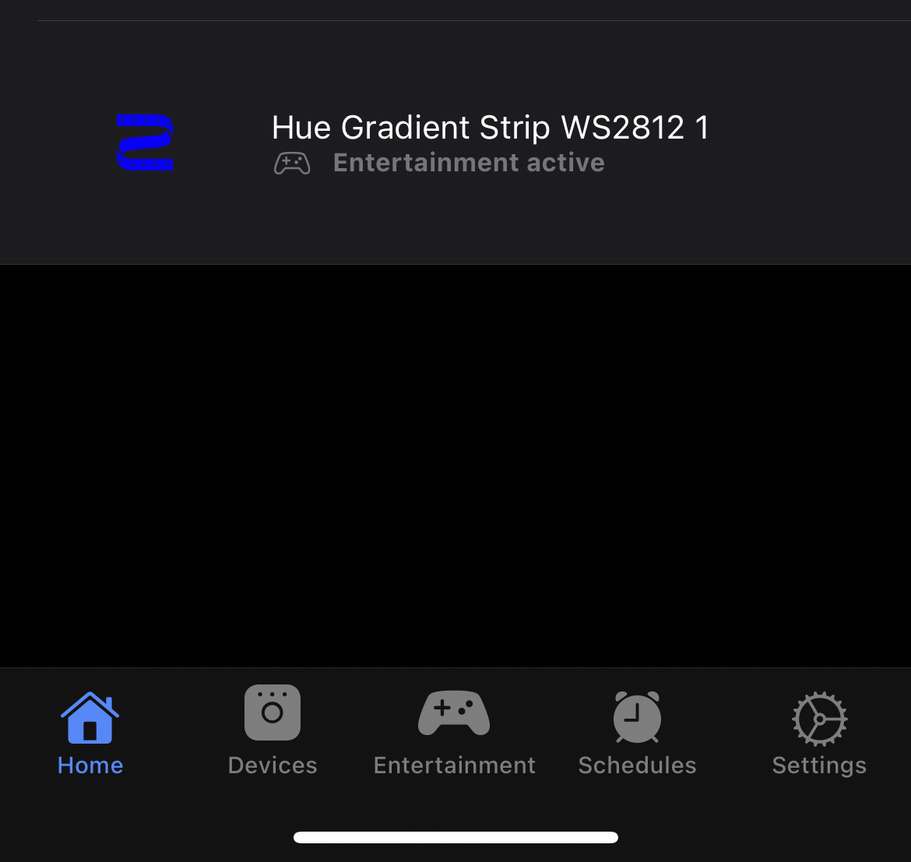
On your phone, connect to the WiFi network that is created by the controller. You should see a WiFi network called like: Hue Gradient Strip WS2812.
-
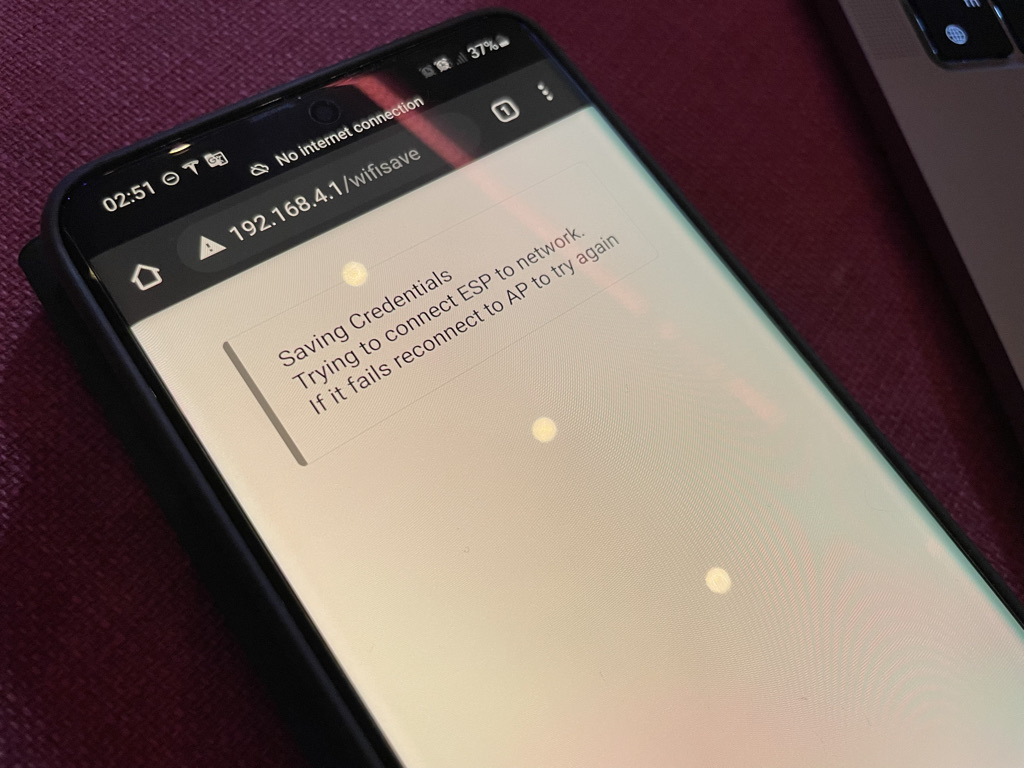
Open a web browser on your phone, and go to 192.168.4.1
-
On the web page, connect the controller to your WiFi network. Tap on ‘Configure WiFi’, tap on your network and enter the password of your WiFi. When you set your Wifi credentials, your phone will disconnect from the temporary WiFi address of the lightstrip.
-
The controller and your phone should now both reconnect to your WiFi network
-
Open a web browser, and go to the IP address of your controller. You can find its IP address in the list of connected devices on your router; your lightstrip will identify something like hue-Hue-Gradient-Strip-WS2812
-
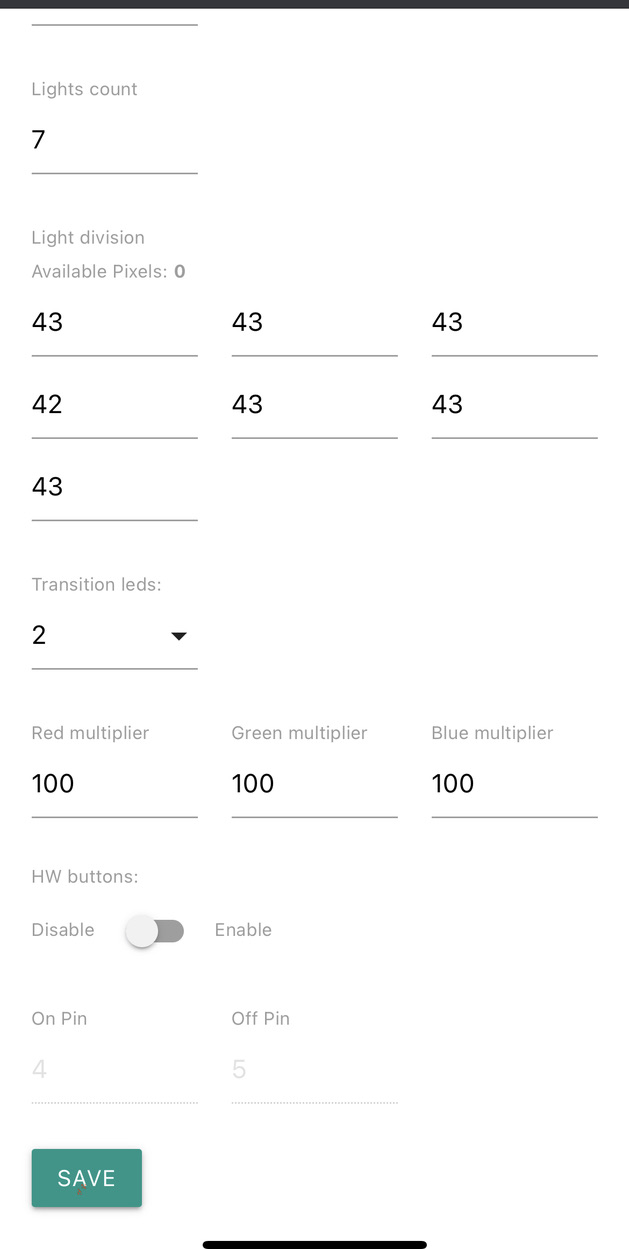
Go to Preferences and configure the Pixel count. This is the amount of LEDs (pixels) your lightstrip has. For example, when you use a lightstrip with 60 LEDs per meter, and the total length is 5 meters, then you have 60*5=300 pixels.
In our example we entered 300 in the field Pixel count. -
Currently the firmware supports 7 zones to stay in line with the Philips Hue Gradient. Lights count should stay on value 7. Light division tells how many pixels (LEDs) there should be per zone. Our example lightstrip has 300 LEDs; This means 300/7=1 zone of 42 + 6 zones of 43 Pixels.
Finally, tap Save at the bottom. Now all LEDs on your strip should switch on after its automatic reboot. (As a result both Dance Sensation and Sync in Hue Essentials will provide 7 different colour zones over the full lightstrip). -
You may also want to set a manual IP address. Go to Network Settings tab and move the slider for Manual IP assignment to Enable. For best results, you also need to assign the same IP address as a static IP in your router.


Install diyHue
diyHue is a simulated bridge. It is installed on a tiny PC like a Raspberry Pi which can stay powered. Hue Essentials connects to this bridge.

Below is explained how to install diyHue. See the additional instructions in the following link: Getting Started — diyHue 1.0 documentation
diyHue installation via Docker (replace XX:XX:XX:XX:XX:XX in code below with MAC address of your ethernet controller; you may find this address in your router. You can find your MAC address of a Raspberry Pi by using the command ifconfig in a terminal, then look for eth0: in the output, the MAC address is listed behind ether.)
Enter the following commands in a terminal on your Raspberry Pi:
sudo apt update && sudo apt upgrade -y
curl -sSL https://get.docker.com | sh
sudo usermod -aG docker pi
sudo docker run -d --name diyHue --restart=always --network=host -e MAC=XX:XX:XX:XX:XX:XX -v /mnt/hue-emulator/export:/opt/hue-emulator/export diyhue/core:latest
Once your installation of diyHue has completed, you need to open the app Hue Essentials and search for your new bridge. Only Hue Essentials is fully compatible with diyHue.
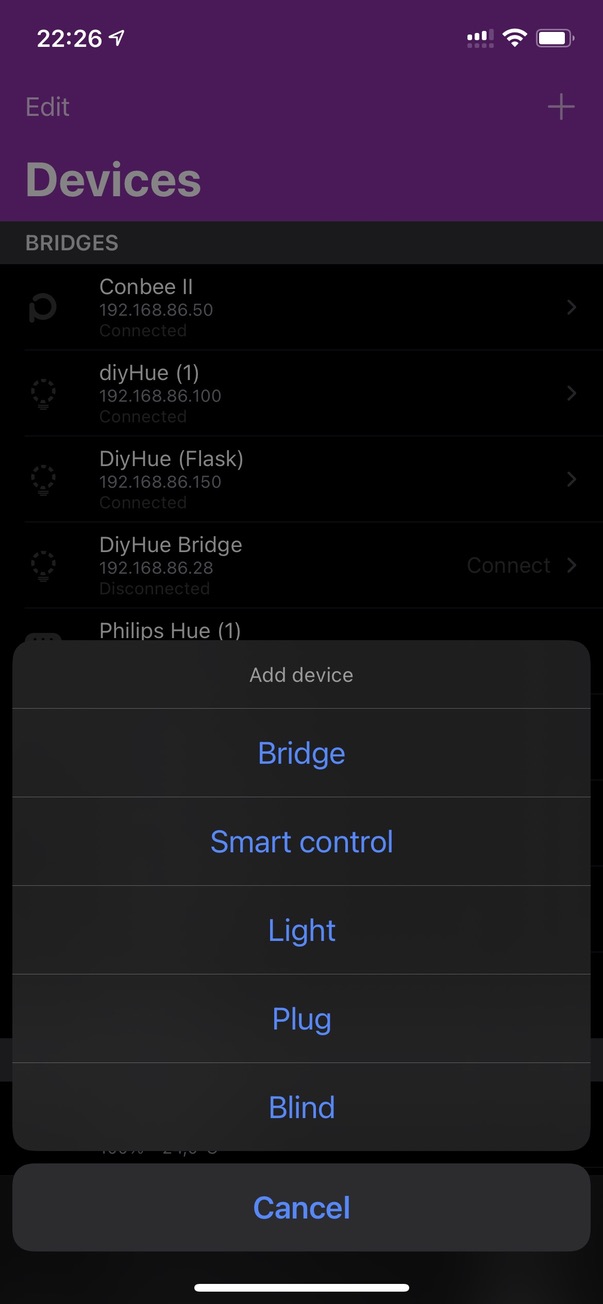
- Open Hue Essentials and go to the Devices tab
- Tap + to add a device
- Select Bridge
- Tap on the new diyHue bridge
- When it asks to Press the push-link on the bridge, then open the network address of your diyHue Hue emulator in a web-browser. Press the three lines icon and select Link device.
- When asked for a password, enter:
Username:admin@diyhue.org
Password:changeme
Please refer to Getting Started — diyHue 1.0 documentation for further support on diyHue
Now your diyHue bridge should get connected in Hue Essentials and you can control its devices through Hue Essentials on your phone.
Connect the lightstrip to diyHue
Now we will add the lightstrip to diyHue in order to make it seen in Hue Essentials.
- Open Hue Essentials and connect it to your diyHue emulator
- Go to the Devices tab, tap the + button, tap Light, and select your diyHue emulator
- Tap Search for lights in Hue Essentials
- Your gradient light strip should appear in Hue Essentials now. If it does not appear, try searching for lights multiple times. diyHue may report 0 lights found even though lights have been found.
- Now you can create an entertainment area under the Entertainment tab and start Sync.
How to create an Entertainment area in Hue Essentials
If you are confused how to create Entertainment Zones, this post on our community may be a good read.
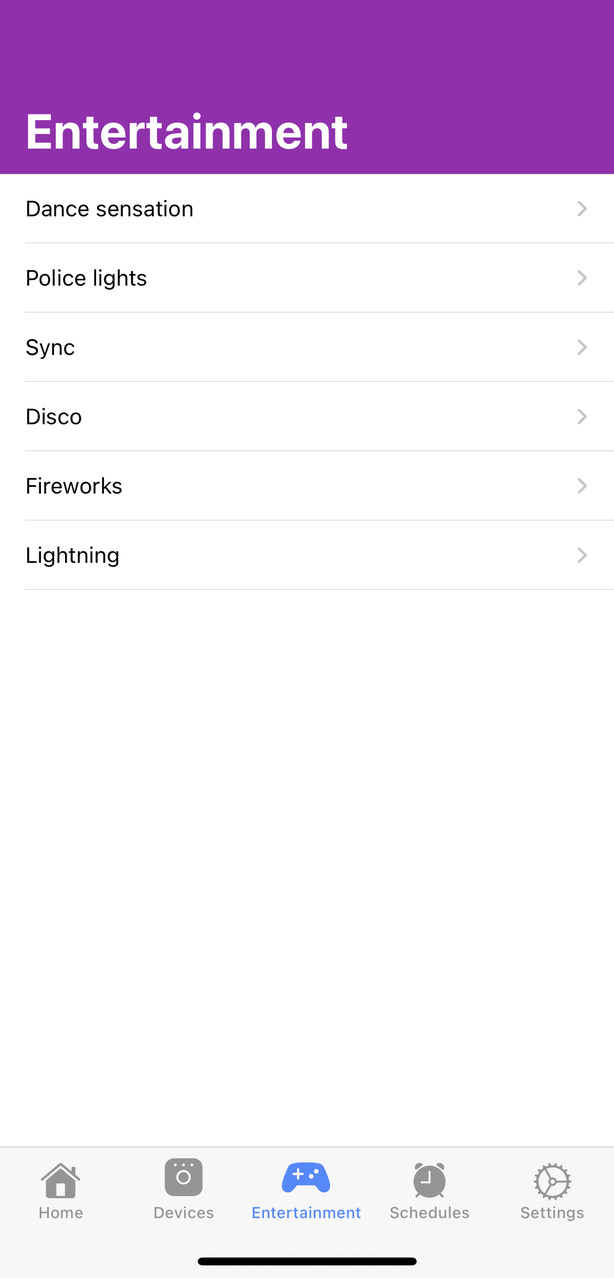
- Go to Entertainment tab
- Select for example Dance Sensation
- Select Entertainment area
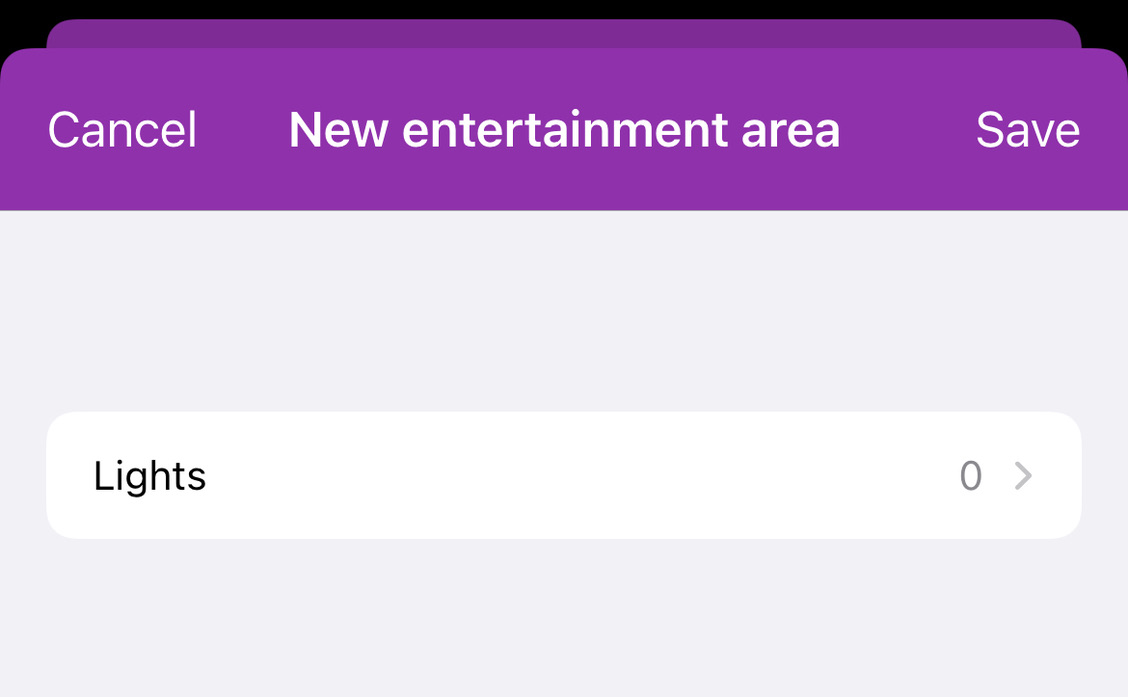
- Tap + to create a new Entertainment area
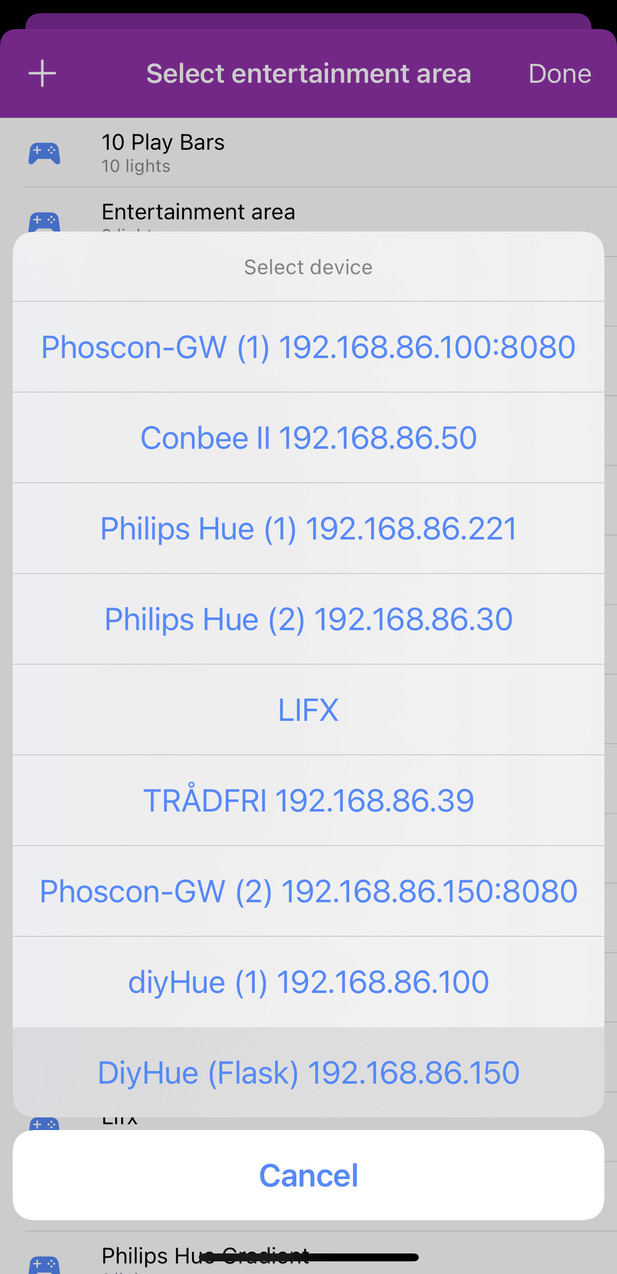
- Select your diyHue bridge
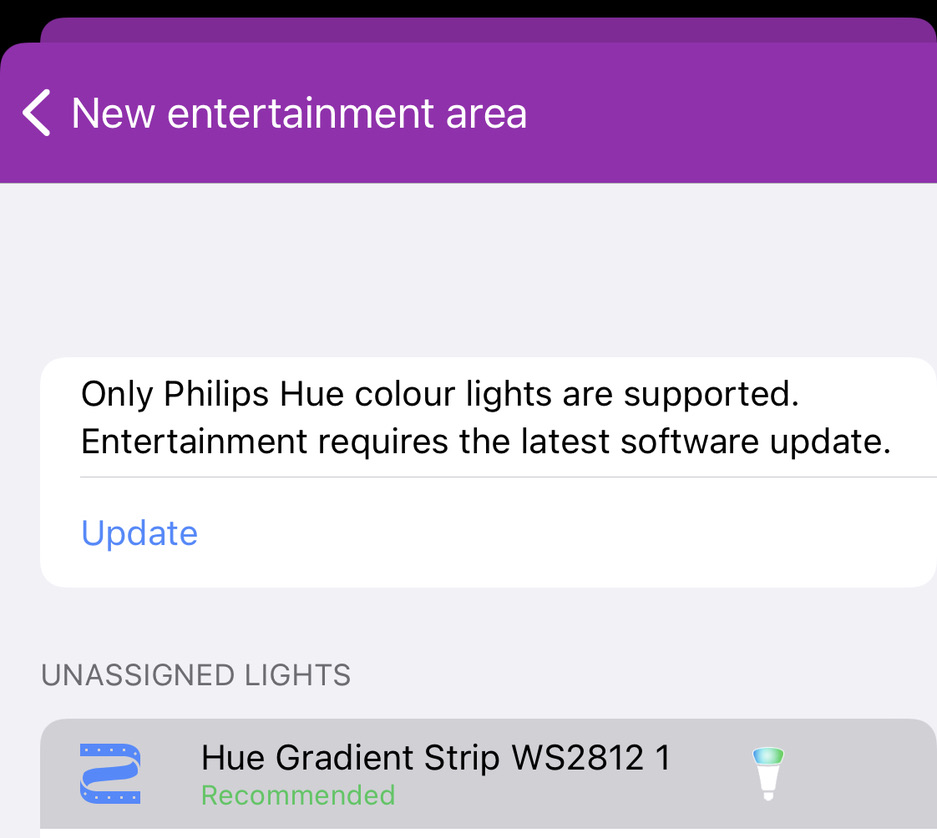
- Choose Philips Hue as diyHue emulates this gradient as if it were a Philips Hue Gradient
- Tap on Lights
- Select your Hue Gradient Strip
- Go back (<)
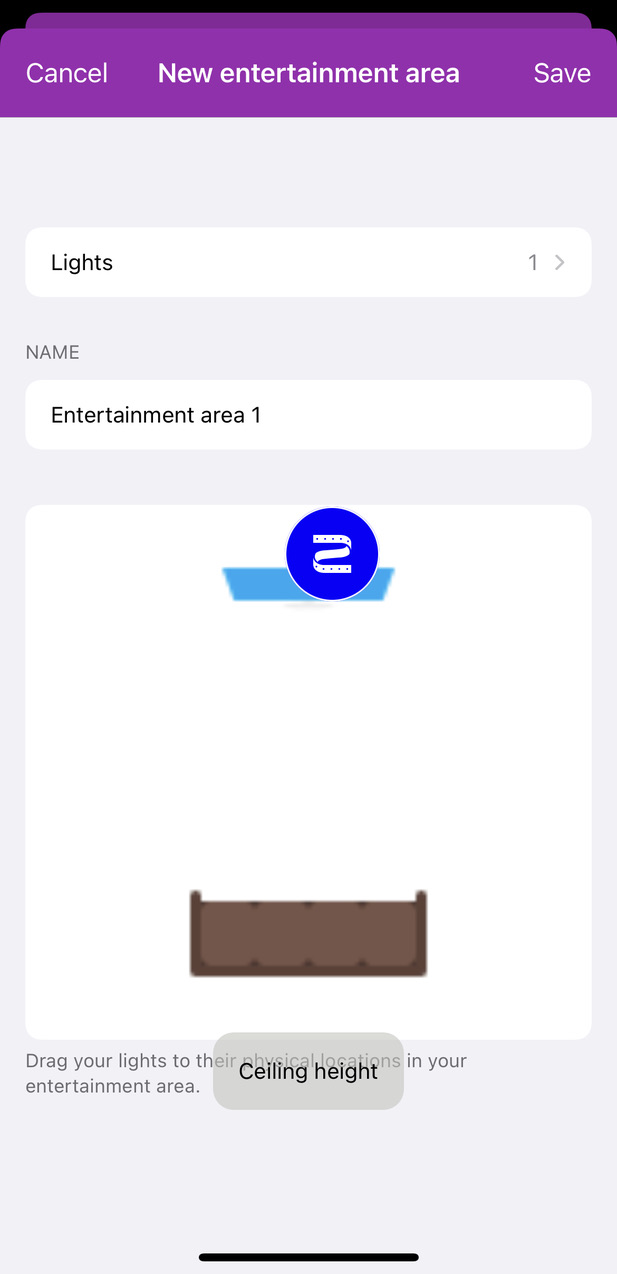
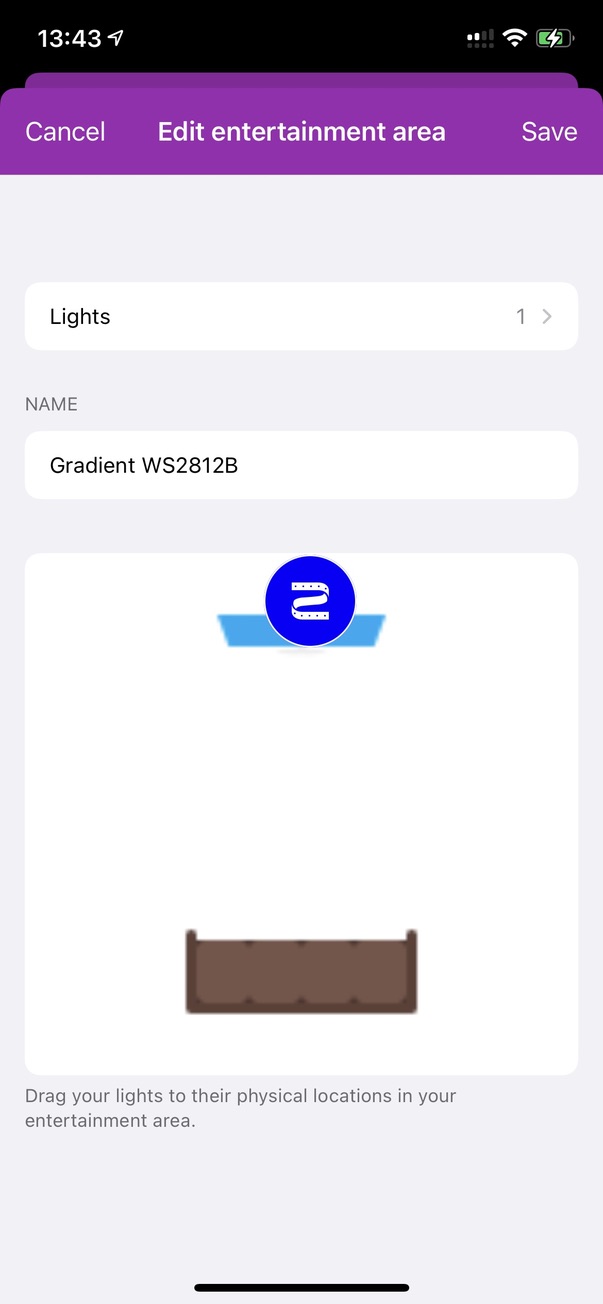
- On the Entertainment area screen, move your light to the physical location in your room (place your finger on the light and drag it to the desired position)
- Tap on the light multiple times until it reaches its correct height (ground height, TV height, ceiling height)
- Rename the contents of name field to your choice
- Tap Save
- Now you can use this Entertainment area for all your Entertainment in Hue Essentials, like Dance Sensation or Sync.


Amazon links
As an Amazon Associate I earn from qualifying purchases. The price remains the same for you!
