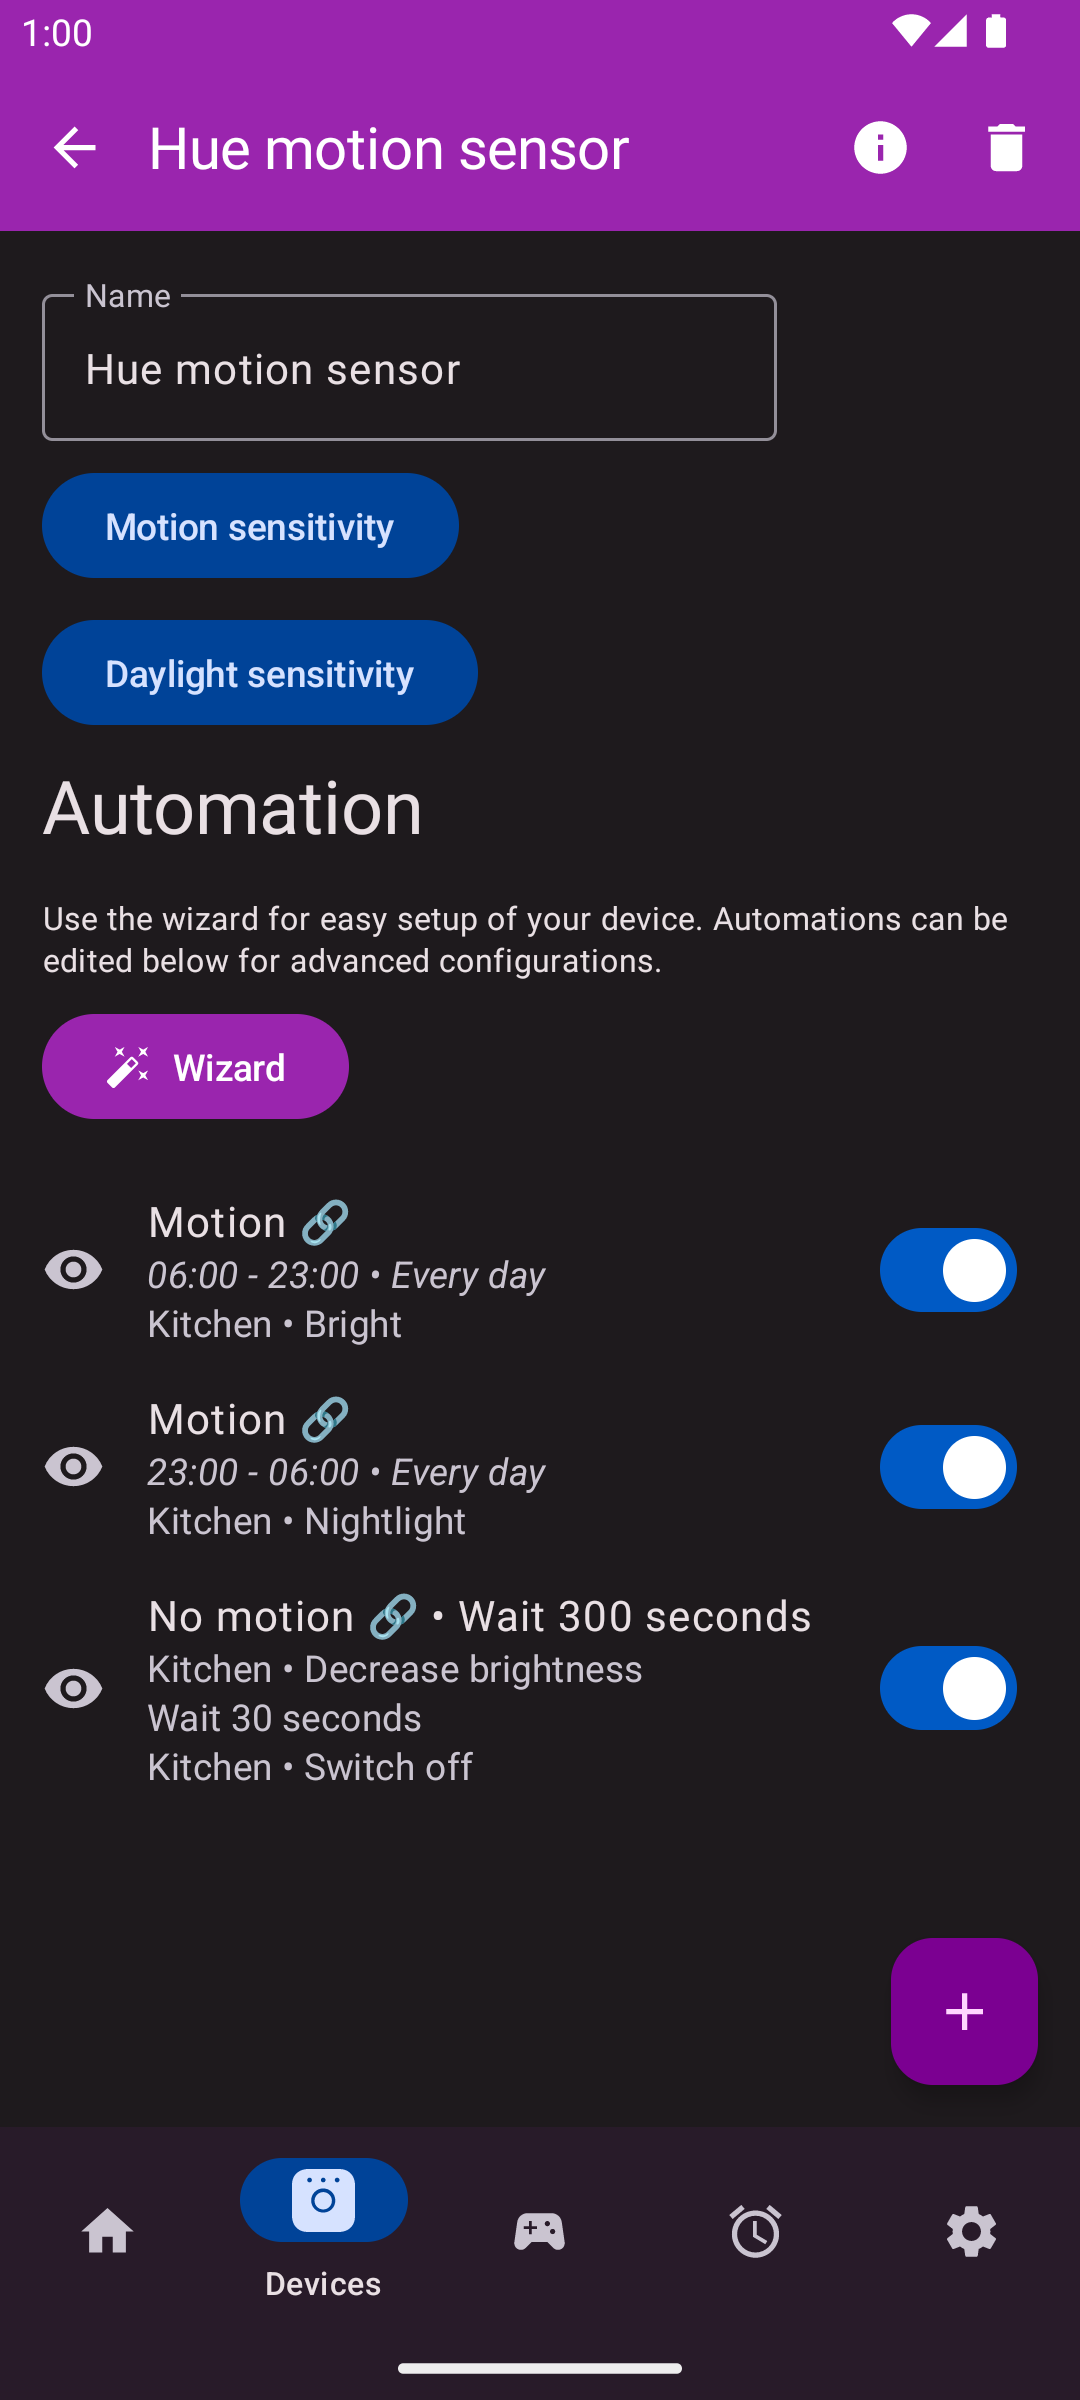
This is an example of an automation in Hue Essentials.
With Hue Essentials you can set up your motion sensor to execute different actions based on the time or day of week. You can split your motion sensor actions by whatever amount of time or days you want. You could use different scenes in the morning, evening, and night. Or even different scenes on weekdays and weekends. Or a combination of both.
Setups you may already know from Hue Labs can be created in Hue Essentials with more customisation: “Three times is a charm Formula” (but now more than three time splits/alternations) and “Sensing the weekend Formula” (but now whatever day you want).
Create automations for switching on the lights
First we will create some automations to switch on the lights when motion is detected. In this example we will create two, one for day time and one for night time. You can create as many as you need.
First automation - day time

- Open Hue Essentials
- Go to the Devices tab
- Select your motion sensor
- Tap the + button under the Automation header
- Make sure the device state event is set to Motion
- Tap the Add condition button and select Time
- Select a start and end time, in this example we will use 06:00 - 23:00
- (optional) change the days if you want different actions based on day of week
- Tap the Add action button and select Activate scene
- Select a room/group and select your scene
- Save the automation
Now you have created your first automation. Let’s create another one for a different time/day range.
Second automation - night time
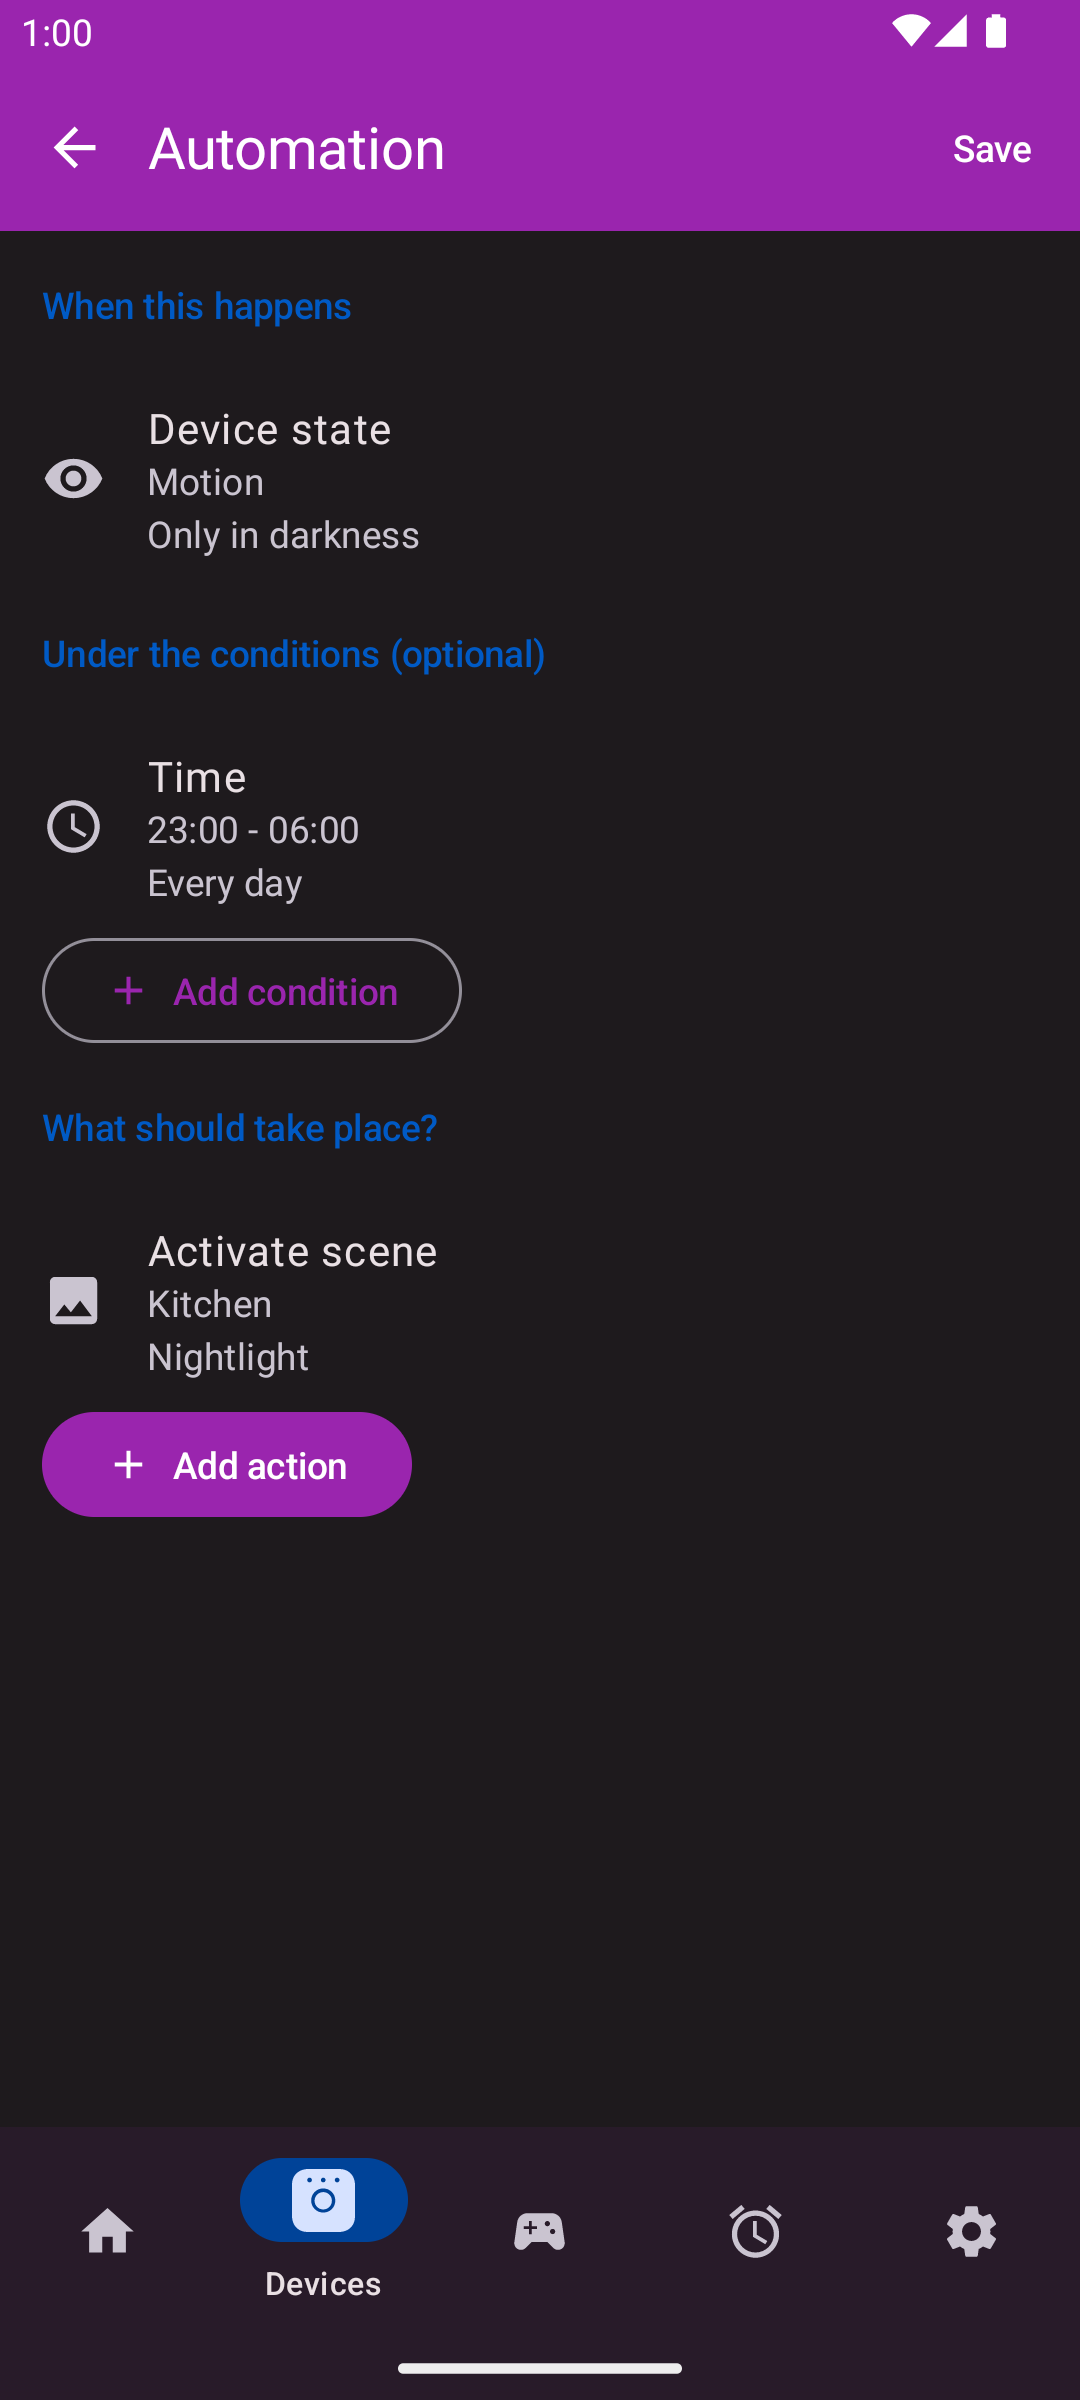
- On the same screen, tap the + button under the Automation header
- Make sure the device state event is set to Motion
- Tap the Add condition button and select Time
- Select a start and end time, in this example we will use 23:00 - 06:00 (opposite of earlier)
- (optional) change the days if you want different actions based on day of week
- Tap the Add action button and select Activate scene
- Select a room/group and select a different scene
- Save the automation
Now you have created two automations that will activate different scenes based on the time of day. You can customise and repeat these steps for even more time slots or with days.
If you would prefer your motion sensor to not override your current scene you applied manually, you could try adding a condition that your group must be off. Similar to the “Do not disturb my scene Formula” in Hue Labs, this will prevent your motion sensor from activating if the lights are already on. Make sure to add this to all your automations with the Motion event only.
Create automations for switching off the lights
The lights will switch on, but we need another automation to switch them off again. Of course you can also customise this based on time and day, but to keep it simple we will just create one automation here. This automation will dim and then switch off lights when motion is no longer detected.
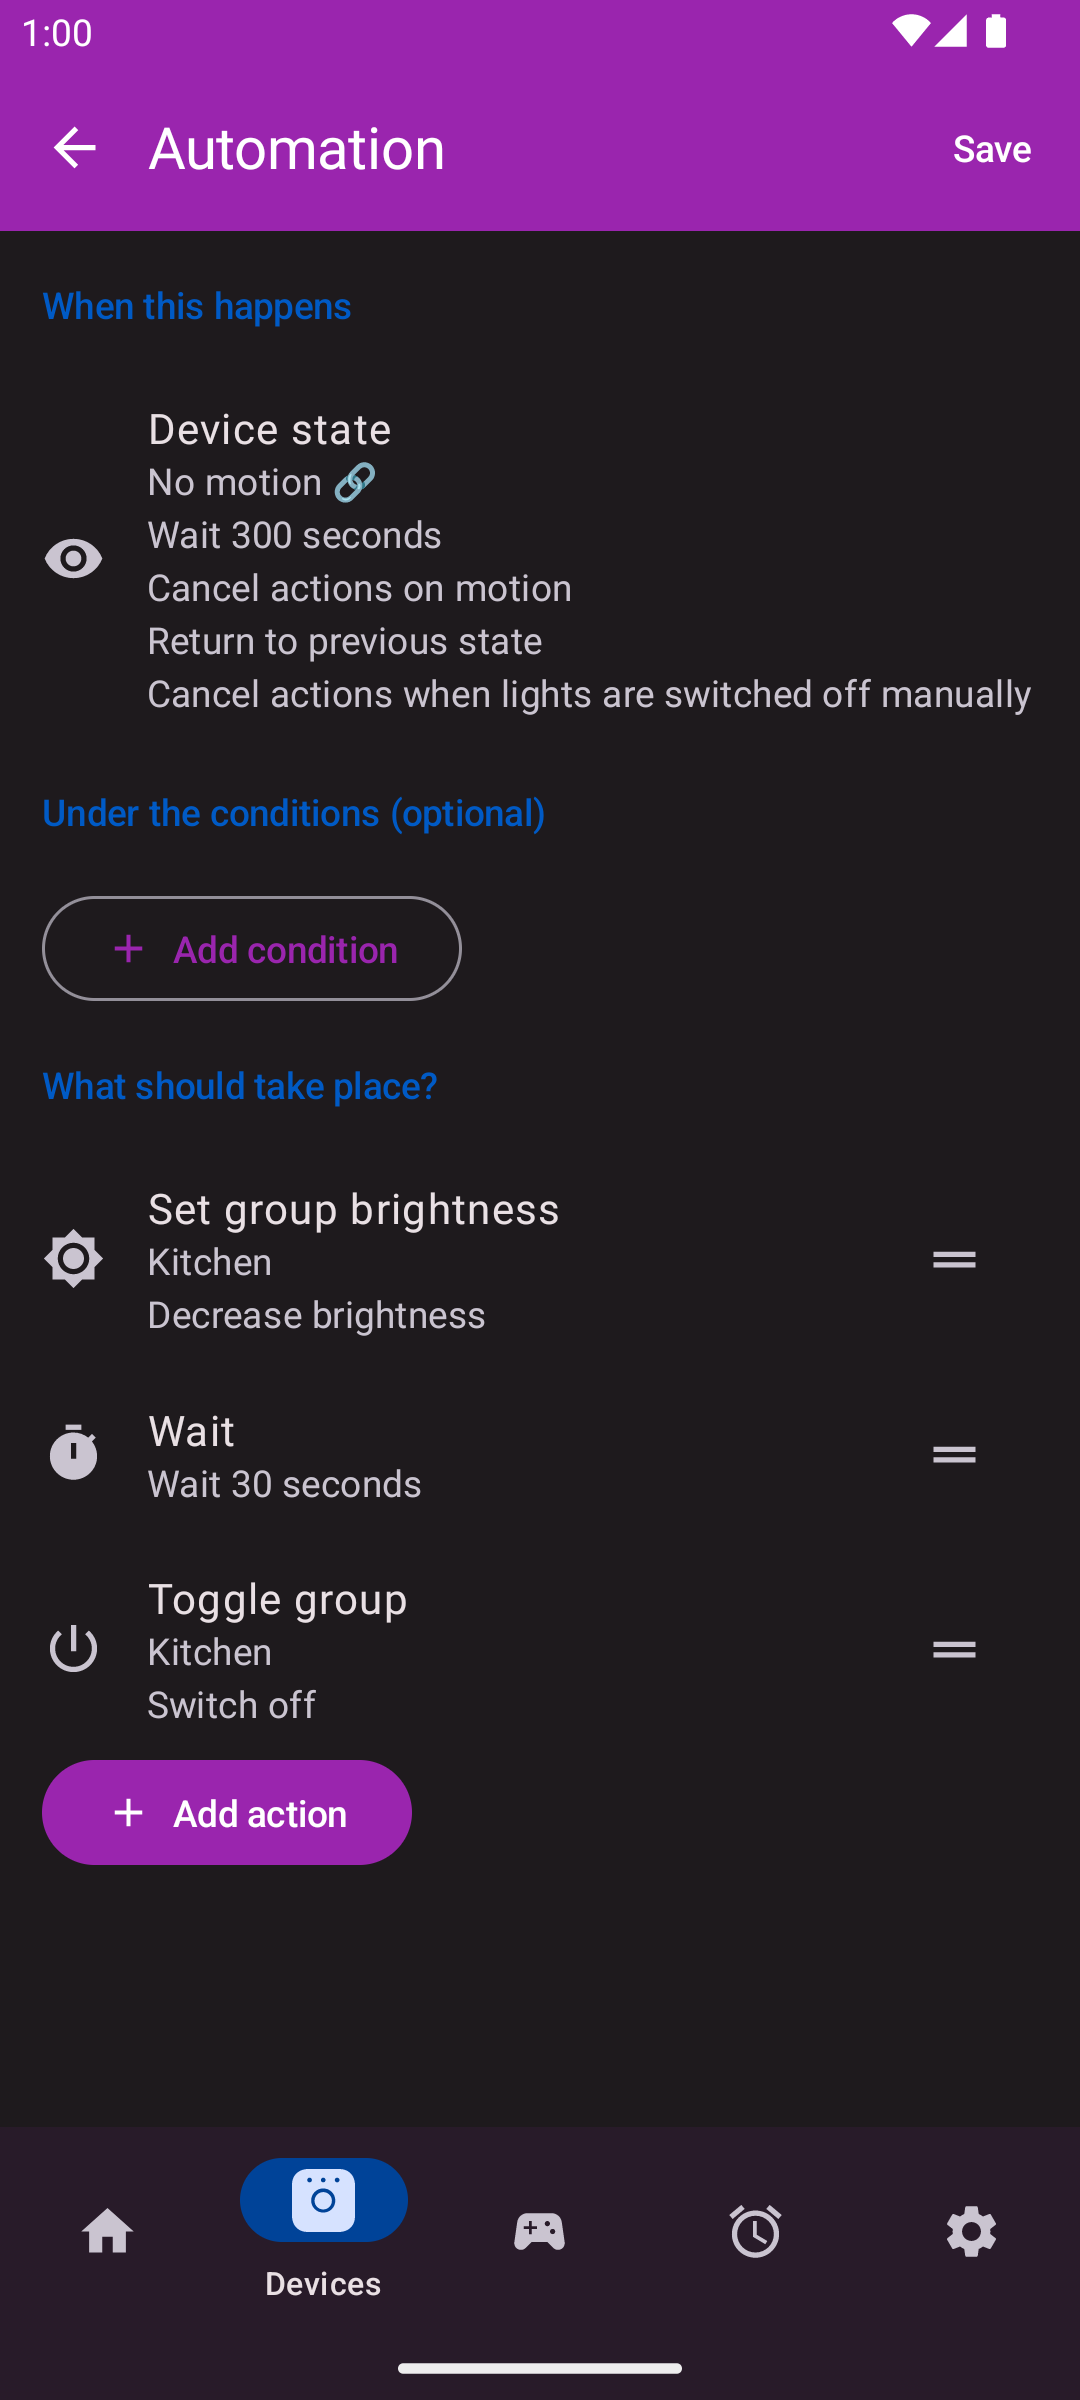
- On the same screen, tap the + button under the Automation header
- Make sure the device state event is set to No motion
- (optional) set a wait time if you want to keep your lights on longer, for example 5 minutes
- Tap the Add action button and select Set group brightness
- Select your room/group. Set the type to Decrease brightness with percentage to 50%.
- Tap the Add action button and select Wait
- Set a wait time of 30 seconds
- Tap the Add action button and select Toggle group
- Select a room/group and make sure the state is set to Switch off
- Save the automation
Now you have set up your motion sensor to activate different scenes based on time and day, and switch them off again when motion is no longer detected.